Imagine you're halfway through building a new feature when an urgent production issue appears. Your working directory contains several unfinished changes, but you need to switch branches immediately.
Creating a temporary commit is possible, but it clutters your Git history with unnecessary "work in progress" commits.
This is where Git Stash becomes incredibly useful.
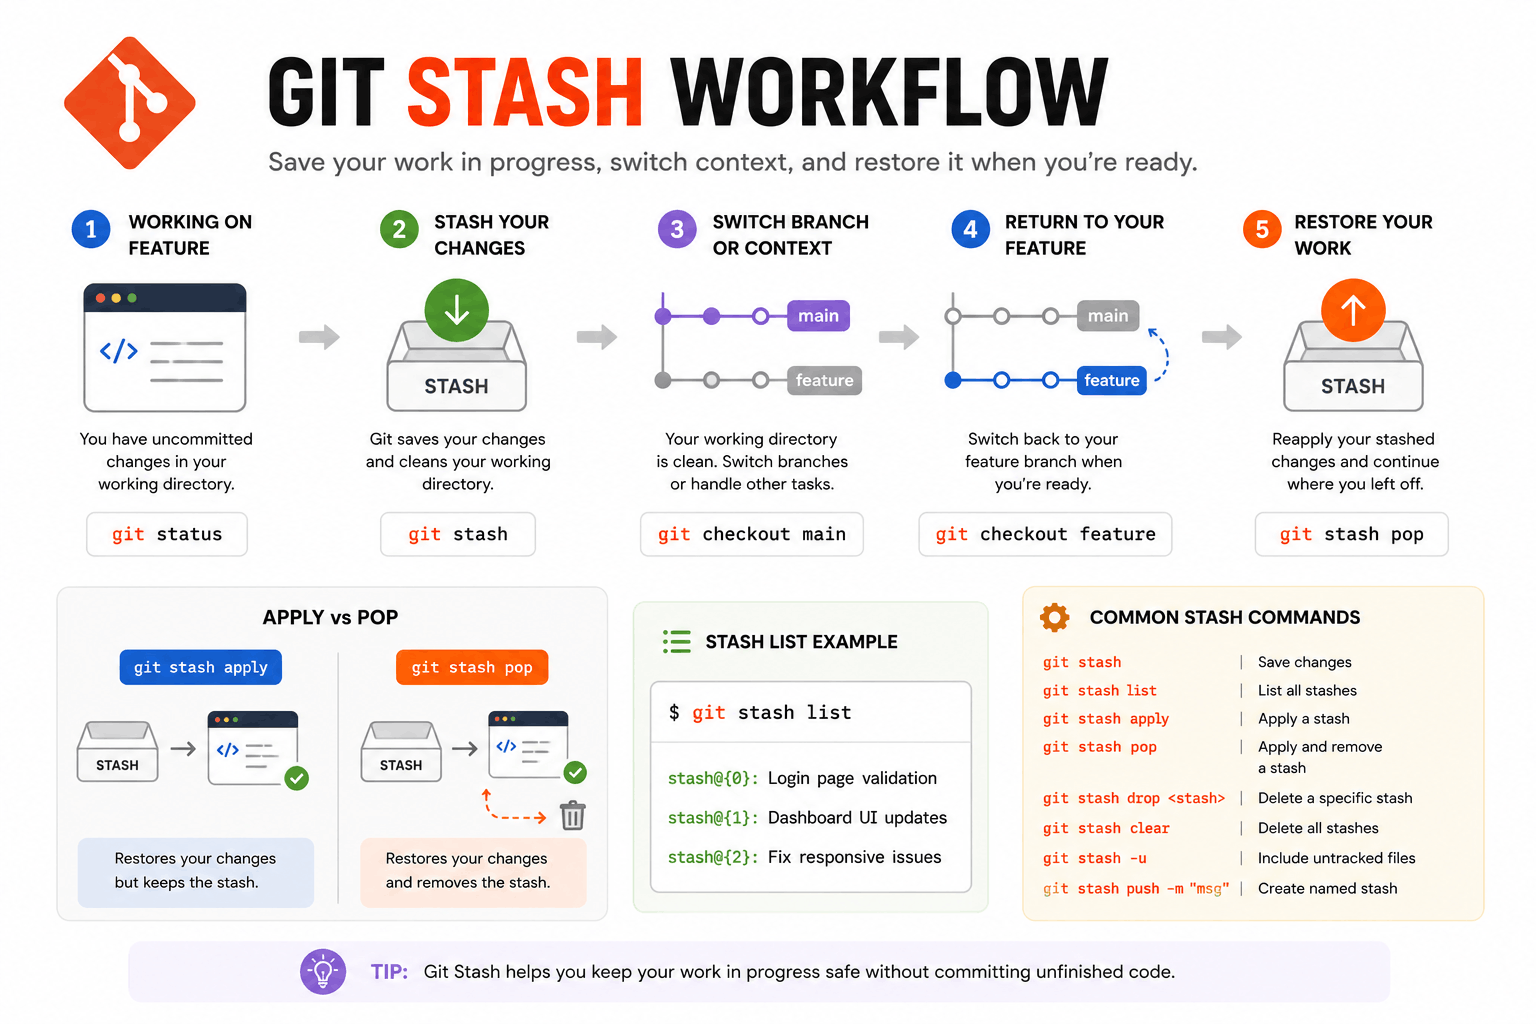
Git Stash allows you to temporarily save uncommitted changes, return your working directory to a clean state, and restore everything later when you're ready to continue. Think of it as a temporary storage box for unfinished work.
What Is Git Stash?
Git Stash temporarily stores your modified files without creating a commit.
Instead of committing incomplete code, you can save your changes, switch branches, fix another issue, and later restore your work exactly where you left off.
The most basic stash command is:
git stash
After running the command, your working directory becomes clean while Git safely stores your changes in a stash.
A Real-World Workflow
Let's say you're working on a login feature and suddenly need to fix a production bug.
Save your unfinished work:
git stash
Switch to the production branch:
git checkout main
Fix the issue and commit it:
git commit -m "Fix production login issue"
Return to your feature branch:
git checkout feature-login
Restore your saved changes:
git stash pop
Your unfinished login feature returns exactly as you left it.
This is the most common use case for Git Stash in real-world development.
Git Stash Apply vs Pop
Many developers confuse these two commands.
Apply
git stash apply
Restores the stash but keeps it in the stash list.
Use this when you may need the stash again.
Pop
git stash pop
Restores the stash and removes it from the stash list.
Use this when you're finished with the stored copy.
A simple way to remember:
- Apply = Restore + Keep
- Pop = Restore + Delete
Viewing and Managing Stashes
Git can store multiple stashes at the same time.
View them using:
git stash list
Example:
stash@{0}: Login page validation
stash@{1}: Dashboard redesign
stash@{2}: API improvements
You can apply a specific stash:
git stash apply stash@{1}
Create a named stash:
git stash push -m "Login page validation"
Delete a specific stash:
git stash drop stash@{0}
Delete all stashes:
git stash clear
Useful Git Stash Commands
git stash          → Save current changes
git stash list        → View saved stashes
git stash apply       → Restore and keep stash
git stash pop        → Restore and remove stash
git stash drop        → Delete a specific stash
git stash clear       → Delete all stashes
git stash -u         → Include untracked files
git stash push -m "message" → Create named stash
Common Mistakes to Avoid
One of the most common mistakes is treating Git Stash as permanent storage. Stashes are intended for temporary work. If changes are important and ready to keep, create a proper commit instead.
Another mistake is forgetting that untracked files are not included by default. If you've created new files, remember to use:
git stash -u
to include them in the stash.
When Should You Use Git Stash?
Use Git Stash when:
- Your work is incomplete
- You need to switch tasks quickly
- You want a clean working directory
- You don't want temporary commits in history
Avoid Git Stash when:
- The work is complete
- Changes need to be shared with teammates
- You need long-term storage
In these situations, creating a normal commit is usually the better option.
Final Thoughts
Git Stash is one of the most practical Git commands for everyday development. It helps you pause work safely, switch contexts quickly, and continue where you left off without polluting your commit history.
The commands you'll use most often are:
- git stash
- git stash list
- git stash apply
- git stash pop
Master these commands and you'll be able to handle interruptions, urgent fixes, and context switching much more efficiently.